Monday, 2 November 2015

Artificial Plant

DECORATING A DRIED PLANT


Dried branches are always used for decorating house. 
I did not like to keep it in the same way. I thought of adding some leaves and flowers  to it. 
And the result is this


  • I  am sorry that  cannot the share the whole procedure. But this may give an idea and add our creativity.


  • Materials used for this are
  •  A dried plant
  • Foam sheets of green and pink (use any colour for flowers)
  • Thin wires
  • Green tape
  • Pips for flowers
  • Cutter and thread
  •                                     
                                                       
I have used a dreid part of palm plant. After the fruits are dried it becomes the below picture.
Handle them carefully as they are brittle.I left them in sun atlest for a week to become dry completely.


                                                                                                                                                                                  Now its time to start with our  work.


 As shown the above picture take a  pink foam sheet  for flowers and cut them in leaf shape for flowers. And green foam sheet for leaves. Cut silver colour wire in it small pieces.


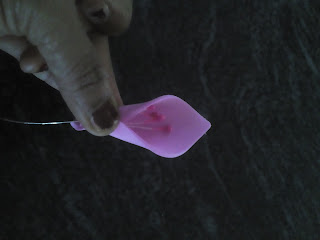
Attach the pips to the wire as shown.


Place the wire in the middle 


And fold it from both the sides and tie it firmly with a thread


Cover the thread and wire with green tape.Make all the flowers and keep them ready


Now take the leaves and cut  them as shown


put the leaves to the plant and cover it green tape.


Add flowers and leaves .


I made few butterflies to addea them here and there.


Note:Some of the pictures are not clear because they were taken different times of day.Sorry for inconvenience. Feel free to ask any doubts.


HAPPY CRAFTING


Friday, 9 October 2015

Rose Mobile

ROSE MOBILE

Today i have a tutorial to share for a 3d paper Rose mobile.This is not exactly a wind chime but looks great in your living space or bed room. I loved so much doing it.

To make this Mobile you need 
  • A4 Color papers of u r choice
  • A ring (here a used an old embroidery ring)
  • Needle and Thread
  • Colorful beads of your choice
  • Glue,Scissors


Let us start with roses


To make Roses draw a circle


Draw a spiral design as shown in the picture

Cut the circle

Now carefully cut along the lines drawn leaving a small round at the middle


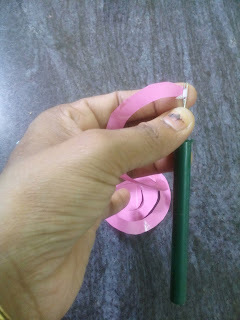
Take a quilling needle and start rolling from the end


Slowely remove it from the needle. Rose looks like this.

Apply glue  as shown and stick the flower.

Finally Your Rose looks like this


Take needle with thread
Make a knot at the end add beads of your choice and insert the rose downwards.


Cover the ring with thread or wool .
Make strings with different color roses. Here i made 9 strings with 4 roses  and 1 for the middle with 5 roses 


Tie all the strings to the ring as shown the thread . And your lovely Rose mobile is ready.


I hanged this in m living room.


Note : you can use different colors of papers or cloth with different kinds of flowers.
           Add colorful beads in between the roses to give beautiful look.

HAPPY CRAFTING :)


Saturday, 22 August 2015

Lovely Heart hangings

 HEARTS SHAPE HANGING TUTORIAL

Using Quilling and making different things is fun. Decorating the walls with  hearts shape hangings on birthdays or in bedrooms gives a new look to your room

These are the step by step procedure of making  hearts shape hangings for u wall

Materials required are
  • Quilling strips
  • A pair of scissors
  • Stapler
Here I used 10 mm quilling strips to make these hangings .

Pictures below will help to understand the tutorial easily
Take to different colors. I found some strips are thin and some are thick. I used thick strips to make hearts and thin strips for wings.
2.Take two different color strips
3.Fold to half
4.Cut them
5.Now fold these strips to half and keep aside.


6.Hold them as shown
7.Fold the yellow strips backward and hold them at the end
8.Add the other color strip
9. Staple them as shown


Make the hearts as shown in pic 10 and 11 and add another strip to make wings and staple them


Continue adding strips till required length


Make hangings using different colors


Decorate them on wall
with lovely hearts

Happy crafting


Paper cup baskets

PAPER CUP BASKETS


Its festival season. Giving haldi kumkum is our tradition. So, thought of making some thing useful from easily available materials.


Materials required are 
  •    Paper cups
  •    A pair of Scissors
  •    Laces and beads to decorate
  •    Stapler
  •    Glue gun or fevicol to stick


  • We can distribute these on different occasions. We can also add stickers of cartoon  and give them to kids on birthdays also.